It’s a hot topic on film blogs everywhere: 48 frames per second. Hollywood’s current standard of 24 frames per second dates back to the 1920s and 30s, when engineers were trying to figure out how to encode sound within celluloid film.
In recent months, filmmakers such as Sir Peter Jackson, Mr. James Cameron, and Mr. Douglas Trumbull have been proponents for an increased frame rate of 48fps, which would eliminate strobing, flickering, and other artifacts present in most modern day films.
Many argue that these artifacts are fundamental to the experience of cinema as we know it, and that their elimination would result in the disappearance of the undeniable magic found in film.
However, an argument in either direction cannot be made without experiencing several films in both mediums. And as it stands right now, our sample sizes are a bit lopsided.
Sir Jackson aim to remedy that situation, and has captured his latest film – The Hobbit – at 48fps.
The response to that knowledge has been mixed, to say the least. Some like it, many hate it, half don’t even know what it means, and the only people to have actually seen any Hobbit footage at 48fps are those lucky enough to have attended a special screening at CinemaCon.
I thought it time to assist in the matter, and give the average person a chance to see how the final product might look. So as a personal project, I converted The Hobbit’s teaser trailer into 48fps.
While it doesn’t truly reproduce the effect you’ll see on the big screen in December, it helps to demonstrate how The Hobbit will be different from a normal 24fps film.
“Now we see but a poor reflection as in a mirror; then we shall see face to face.”
Since there aren’t any online services currently available for streaming high frame rate footage, you will need to download the video clip in order to watch it.
Due to the sheer quantity of data stored in each second of 48fps footage, many computers will struggle to play it smoothly. For this reason, I have provided three different download links to choose from:
[download id=”1″ format=”basic”] – for those with fast computers*.
[download id=”2″ format=”basic”] – for those with average speed computers.
[download id=”3″ format=”basic”] – for those with slower computers.
DISCLAIMER: This video is an UNOFFICIAL presentation of the trailer in the 48fps format, and contains occasional visual distortions that are a result of the conversion process. This footage does NOT truly demonstrate how the final version of the film will appear; it merely helps to demonstrate how it will be different from a normal 24fps film.
*The High Quality video is presented as an FLV file, so you’ll need to get the popular VLC Player (free for both Mac & Windows) in order to watch it.
Reducing the Strain
What did you do upon hearing that The Hobbit would be presented in 48fps? I jumped for joy, as it would relieve a problem I’d dealt with for the last several years: eye strain. Anything with a flicker caused me to go cross-eyed: CRT monitors, fluorescent lights, even the strobing seen in a film. The thought of watching a movie without hurting my eyes was exciting to say the least.
But what would it look like? I had experienced a higher frame rate on the small LCD screen of my Canon 7D, but I’d never shot anything serious in that format, nor had I seen any kind of professionally crafted footage at that speed.
This curiosity intensified in December of 2011 when the first teaser trailer for the Hobbit appeared. I kept wondering, “How was this footage going to look at 48? Better? Worse?”
The screenings in late April polarized the media, and left the rest of us to speculate on things not yet seen.
My interest turned to impatience, and I began to explore the possibility of post-converting the trailer into a higher frame rate. Several methods of accomplishing this task presented themselves, each with with their own distinct strenths and weaknesses.
Just as a stereoscopic post-conversion will never truly match up to a film shot natively in the format with two cameras, the techniques that I’ll outline in the following paragraphs will never recreate the effect gained by shooting natively at that frame rate.
As far I know, the following article is the first public repository of information on this topic. If you know of any others, or have any further knowledge related to this concept, please drop me a line – what I have written here just scratches the surface of what it could become.
Without any further ado, let’s get going.
Initial Conversion
Those familiar with post-production are no doubt aware of plug-ins such as Twixtor and Kronos that allow users to turn their regular speed video footage into super slow-motion extravaganzas. Essentially, these programs examine each frame of footage you provide and figure out what happens between each pair of adjoining frames. It can then use this data to create entirely new frames that are placed between the originals.

Kronos examines the original frames (black) before creating new frames (grey). The source frames are then discarded so that flickering doesn’t occur in the new footage.
When used at its default settings, Kronos will take a piece of source footage and reduce it’s speed by 50% – a process that doubles the amount of frames present, meaning each second of original footage would have it’s 24 original frames converted to 48 new frames.
Now it’s just a simple matter of repurposing the frames’ metadata so that they increase the frame rate of the footage instead of slowing it down.
To best accomplish conversion via Kronos or Twixtor, the user must first separate their original footage into individual shots, then apply this effect onto each of them one at a time, taking time to tweak the plug-in’s settings for optimal quality.
After the shots have been rendered, they can be recombined into a new sequence, re-synched to the original soundtrack and exported into a rudimentary form of 48 fps.
Distortion
While the footage may play back at the correct speed, it may not look anywhere near correct. Software packages such as Kronos usually create some form of distortion on clips that contain significant motion.
This can be seen throughout my post-conversion of the trailer: watch closely as the dwarves toss plates over Bilbo’s table, and also as Bilbo hops the Hobbiton fence in the following shot.

When Kronos attempts to process clips with a significant amount of motion, distortions are usually created.
Kronos provides several tools within the plug-in for dealing with many kinds of distortion. Most of these techniques require some time to execute, and may or may not work within the paramaters of the particular shot you’re working on. Like a difficult color key, trial and error may serve to be the only plan of attack.
Brute Force
Some shots have so much motion between frames that nothing can be done within the plug-in itself to achieve a clean result. It’s at this point that a brute force technique must be implemented to generate new frames. Working by hand is incredibly slow, but it produces high quality results on tough shots.
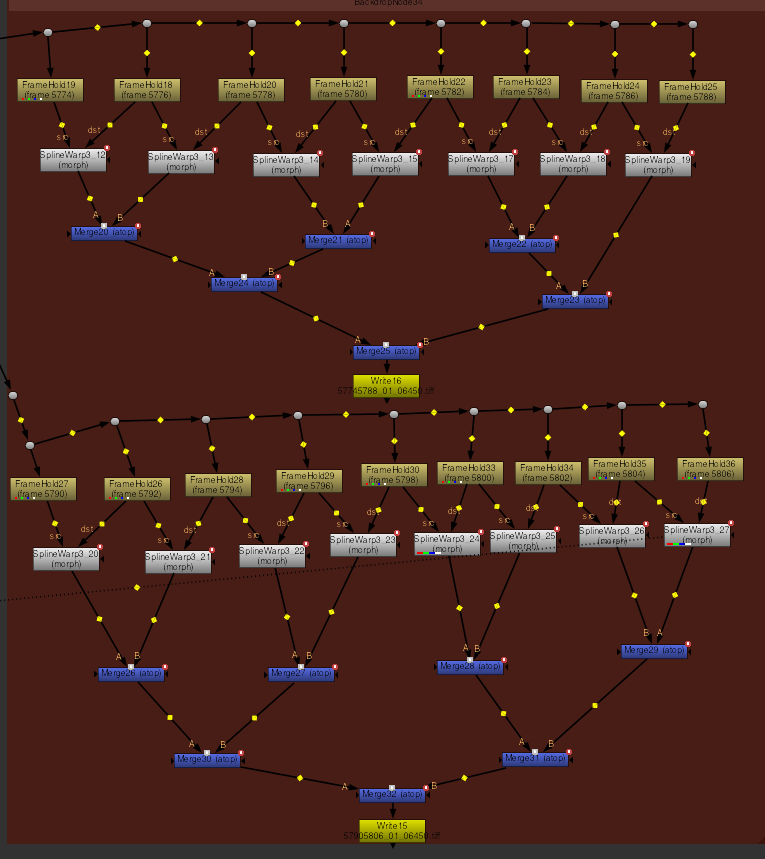
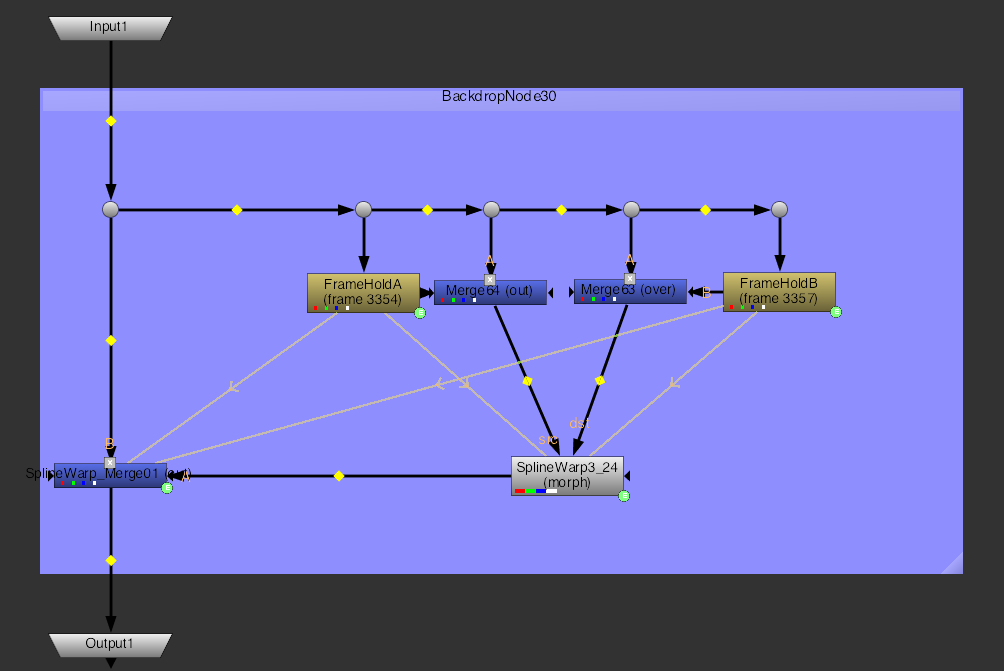
My technique of choice was the use of SplineWarp nodes in Nuke which allow the user to “warp” between two master frames, thus allowing the creation of additional frames in between.
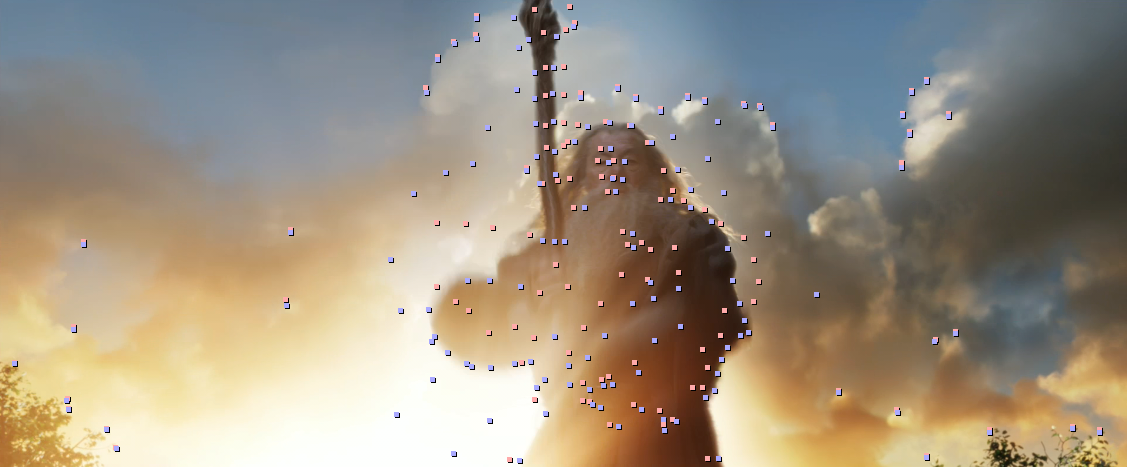
A SplineWarp node at work. Pink dots represent a point’s position on the first master frame, blue dots represent where those points moved to on the second master frame.
To convert one second of regular footage, 24 new frames need to be generated. On average, it took me 15 minutes to do one frame. That’s 12 hours to convert just two seconds of footage. Needless to say, this technique is best saved as a last resort.
Saving Time
In situations where you don’t have much time (i.e. always), it may be necessary to cut corners by eliminating time consuming steps. If one was attempting to quickly convert a sizable sequence that didn’t contain notable quantities of fast movement or require a significant amount of brute-force conversion, it might be worth while to run the entire sequence through Kronos or Twixtor in one go instead of separating it into individual shots before conversion.
This can be a bit of a gamble, but if your settings are good you can convert a significant amount of footage right off the bat. You would then have to sort through the resulting render and hand pick sections that need more attention.
Minor distortions could be fixed by painting them out frame by frame. This technique is quite forgiving as each frame is seen for only a fraction of a second, and the eye doesn’t have much time to discern minor changes in sharpness or tonality.
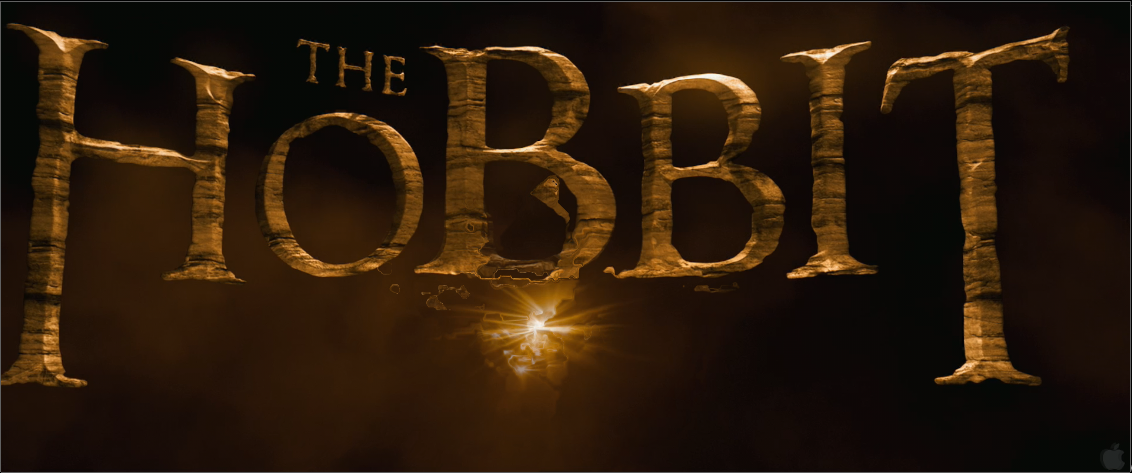
Distortions on the title shot were perfect candidates for cleaning via RotoPaint nodes in Nuke as there was plenty of material in the surrounding frames to clone from.
Converting a multi-shot sequence all at once creates a unique form of distortion whenever the footage cuts from one shot to the next. Essentially, the plug-in will attempt to create two new frames in the space between the two shots, resulting in a highly deformed transition.
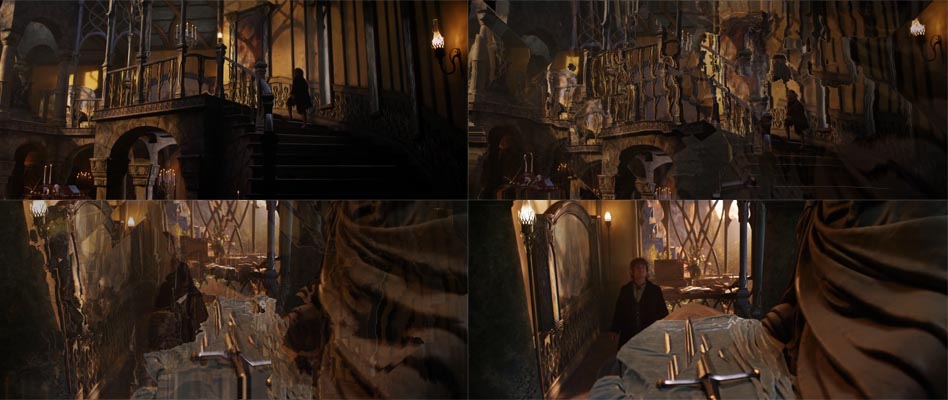
When sending a multi-shot sequence through Kronos, “transitional distortions” are automatically created by the program in an attempt to create a smooth transition between each shot.
Considering the quantity of individual cuts present in an average three minute sequence (the trailer contained over 75) a method must be created by the VFX house to automate the process of fixing the transitional distortion; otherwise the time saved by converting the entire sequence at once will be greatly reduced.
I eventually settled on a series of Nuke nodes that replaced the distorted frames with a duplicate of the nearest clean frame. This results in the last clean frame of the previous shot and the first clean frame of the following shot appearing on screen for 1/24th of a second instead of 1/48th. A cheat of sorts, but it does work: our eyes are too distracted by the change in image to notice the longer frames.
Several Python expressions were written to automate the process, driven by a user-submitted frame value that highlighted the last clean frame before a transition. This value is checked against the current frame of the composition to determine the values for the fades & mixes.
Placing the nodes into a group and saving them as a Nuke ToolSet significantly sped up the process, allowing me to clean a single transition in only 10-15 seconds.
Exporting
When the desired result has been attained and all frames have been rendered, it’s time to re-synch the audio and attain a quality export. Nuke doesn’t have a proper timeline to do the sound synching, and Final Cut 7 doesn’t work well with image sequences (I haven’t used FCX, so I’m not sure of that). Adobe Premiere & Media Encoder CS5.5 don’t work natively with 48fps material (though they do work with 60fps).
After exhausting those options, I settled on performing these tasks in After Effects, which handled the job decently. As there aren’t a whole lot of compression options directly in AE, I opted to export a lossless Quicktime file that I could bring into MPEG Streamclip for the heavy lifting.
I discovered that (as always) it’s very important to test your 48fps exports on different computer systems so that you know whether or not they’ll play smoothly. Highly compressed footage, though smaller in size, can choke up an average computer system. This is why my “Medium Quality” clip is 100 mb larger than the “High Quality” clip.
In Conclusion
If the 48fps format is as successful as it’s proponents believe it will be, then it won’t take long for Hollywood to realize that converting older films into 48fps will generate more income for the studios and provide more jobs for the VFX industry.
Now is the time for companies such as The Foundry and The Pixel Farm to develop new technologies that assist in the process, making it a smoother experience for everyone else down the road.
Sir Jackson: You’ve got my full support on this endeavor, and I can’t wait to see The Hobbit in it’s full glory on the big screen. What a glorious day that shall be.
–
Luke Letellier


36 Comments on “Post-Converting The Hobbit Trailer into 48fps.”
Pingback: The Hobbit: An Unexpected Journey & There and Back again - Seite 10
very nice work. im amazed by your work
i knew about it from fxphd
Pingback: Why ‘The Hobbit’ will take us on an unexpected journey « ANAMORPHIC
Incredible work. I’ve posted a link to this post on my own blog discussing The Hobbit’s non-standard frame rate. It makes me more optimistic about the presentation of the film. It looks good.
Great post. Thank you so much for this. The level of detail involved is quite tremendous and we really value you explaining the process so thoroughly. We will definitly be keeping on eye on your blog from now on.
Pingback: Μια ερασιτεχνική ματιά στα 48fps του Bilbo Baggins | reel.gr
Pingback: Experimenta el trailer del Hobbit a 48 fps [ENG]
Why did you use VP6 video codec? is not a very good election I think.
Are you referring to the High Quality file – the flv? I tried out a dozen or so options and quickly found that there weren’t many formats that (A) supported 48fps and (B) could create a high quality picture in a file size that could relatively easily be downloaded by someone (it would have been impractical to make it 500+ mb in size).
I have converted it to x264 to get hardware acceleration support, it plays now fine for me.
Pingback: El Hobbit, a 48 fps, tiene esta pinta*
Pingback: El teaser trailer de El Hobbit: Un Viaje Inesperado convertido a 48 fps | El Anillo Único
Pingback: Primer vistazo a la revolución técnica de "El Hobbit" | FrikArte
Pingback: Así se verá "El Hobbit a 48fps - DIMENSIONVFX.COM
Pingback: Anonymous
Pingback: El Hobbit a 48fps | Watakshi.net
Pingback: “El Hobbit” a 48 fotogramas por segundo « Smial de Númenor – Sociedad Tolkien
Interesting experiment.
But like xabih I really don’t like your choice of VP6 with FLV container for the “High Quality” version.
AVC h.264 in MP4, MKV or MOV container would have been a MUCH better choice.
Quality is more important than file size. Besides, 500+MB is not that large these days. 😉
Out of curiosity I just checked my archives, and I do have an H264 MP4 version on the HDD that’s 760 MB.
In the end I went with the FLV because I was hoping to attract more casual viewers; many of us who are very interested in it would just shrug our shoulders at 750, but a casual viewer who wants to see a three minute clip? They might just as easily cancel the download so they could spend the bandwidth on Game of Thrones.
Maybe I should have had an “Ultra” quality. 🙂
I downloaded the High Quality clip and the newest version of the VLC Media Player and the clip would not play. It just a bunch of pixelated distortion with the audio running behind it. Is there something else I can try that you know of? I’m really interested in checking out this conversion!
Have you tried playing the Medium Quality or the Low Quality version? The pink pixels usually arrive when a computer isn’t able to handle the file well.
Do you have any idea why the trailer is pink on my computer? (I tried both vlc player and windows media player, and every video quality is pink) 🙁
My guess is that your computer isn’t able to play the High Quality versions; try the medium quality or the low quality version, and you should have better luck. If that doesn’t work, you can try fxphd’s version which is playable in your internet browser:
http://www.fxphd.com/blog/what-might-the-hobbit-look-like-at-48-fps/
Pingback: Trailer zum Hobbit in HFR - Hobbit, Herr der Ringe Film und Mittelerde - Tolkiens-Welt.de
You can do the upconvert soooo much easier and with better results using these instructions:
http://www.spirton.com/convert-videos-to-60fps/
You just have to modify the avisynth script to do 48 fps, not 60.
Results (download to watch):
http://www23.zippyshare.com/v/98436695/file.html
I have to agree with others on the selection of codec for the high quality video. Since you chose flv you are essentially forcing viewers to download a video player that they may not be accustomed to anyway, so it would not have been that far of a stretch to simply use h.264 which would play a lot better.
I have two quad core computers with high end graphics cards and both could play the video but with frequent stuttering.
Pingback: Should you watch The Hobbit in 48 FPS 3D? | Swiftfilm
Could you please provide a .mkv version of the high quality video?
Many GPUs can decode the video so you don’t need a fast computer.
Pingback: Luke Letellier, creator of the unofficial 48 fps 'Hobbit' trailer, talks HFR - HFR Movies
Yes, it could be nice to have a .mkv version of the video 🙂
I really appreciate your effort, but after watching it, it didn´t feel natural to me, I felt like the movie was playing too fast and the motion just felt wrong, that was my impression.
Nice work.
Your trailer became alot famous on the internet
Can you convert the new trailer of desolation of smaug?
Thanks for the comment! Unfortunately, I don’t have the time at this immediate moment to do the post-conversion of the Smaug trailer at a high quality.
Hi, what a great job!
Have you consider applying this method to 3D top bottom or side by side movie files?
There is a good exemple:
The.Hobbit.An.Unexpected.Journey.48fps.Edition.3D.2012.1080p.BluRay.Half-OU.DTS.x264-HDMaNiAcS
I don’t know if you’re aware of that one, but it seems nicely done!
Not yet. The difficulty is that it takes quite a bit of time to do it right.
I guess you’re right!
Still, the 1080p – Extended – 3D t/b- 48fps – version is unavailable. I would love to see this one!!
Thx